

The Four Layers
-Chemise with lace at the neckline
-Brown sottana with side lacings and experimental hide glue stiffening
-Black velvet veste
-Accessories:
-High ruff with a v-neck to fit inside the high veste collar
-Apron
-Slipper shoes (not necessarily to wear out of the house)
-Handkerchif
Chemise
I completely hand-stitched a loose chemise with a lace neckline (heavily starched) to mimic this effect in the final product which can be found in several portraits:

The Chemise


The Sottana
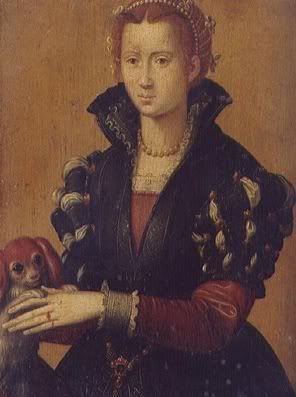
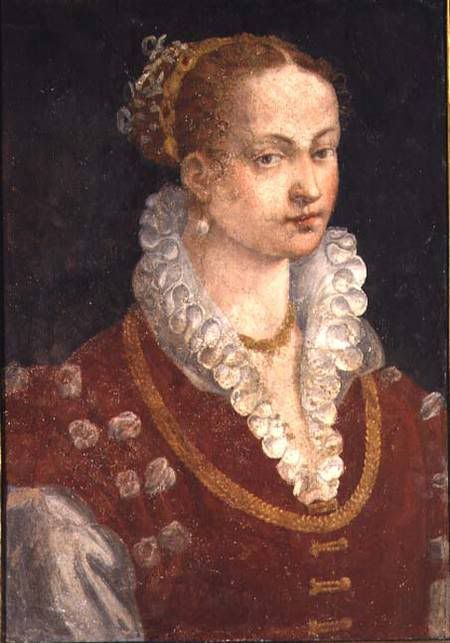
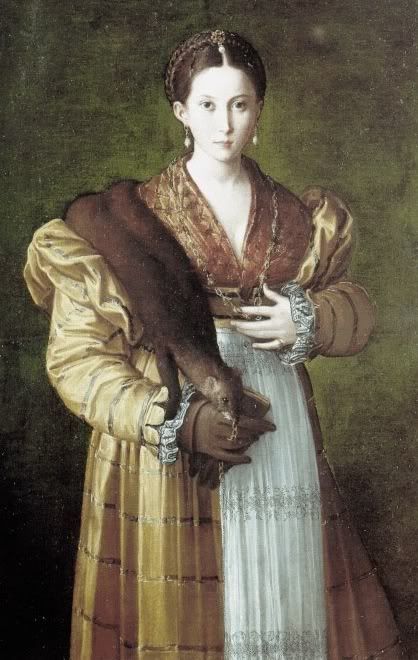
From several portraits it appears that a chocolate brown sottana was common under black vestes. See examples here and here and here and here and here. I used a combination of the following portraits for inspiration.


While some of these images are from later after 1600 or so, they were the best and most detailed examples I could find of a simple, brown sottana like what appears to be under the veste.
The bodice of the sottana is entirely stitched by hand while the skirt is machine stitched and attached by hand. I will never use a fabric that thin for an under dress again, but the shimmer of the fabric is lovely. More details are in the previous report on the garment.
The Sottana


The Veste
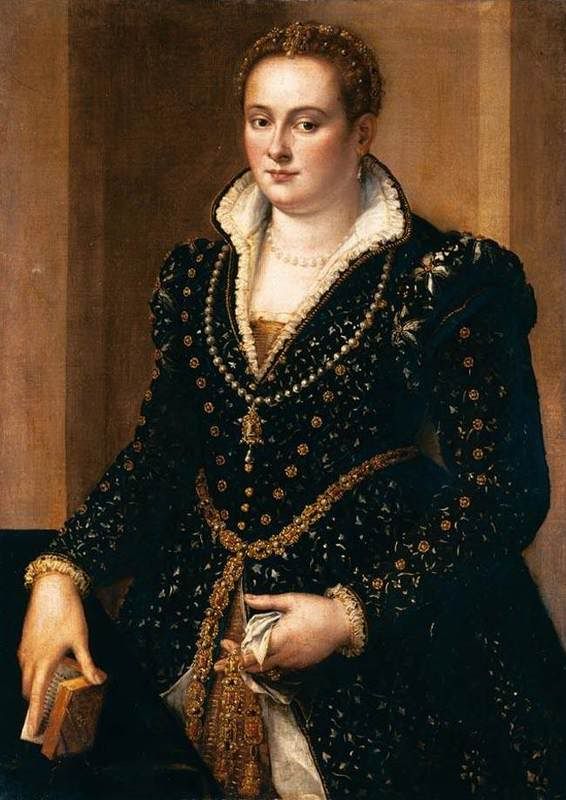
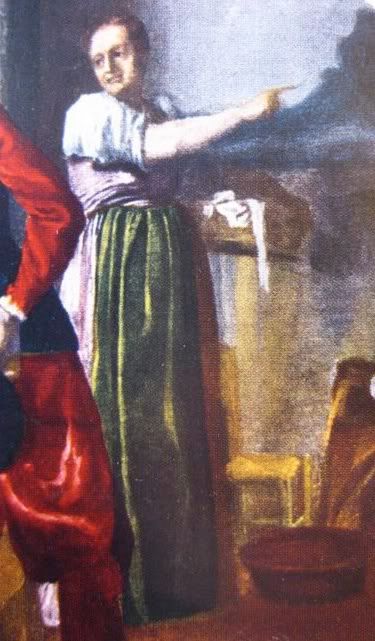
Next came the veste. More or less I was going for something similar to this painting:

The bodice is hand-stitched as previously described except for the shoulder seams because I didn't want to be bothered with that blasted curve. The skirt is machine sewn and hand attached, but I found that I had to take it apart and add some stiff, Gryffindor (you'll see) taffeta fabric to poof it out well. I do like this garment.
Some details:
The front opening has some black lace (found in Grandma's hundred-year-old stash) and I hand-wrapped some buttons. I tried a few methods of wrapping, but loved this one because from the top at least they look like the center of a poppy.
[front opening with big button image]
The baragoni (shoulder rolls) I don't really want to talk about. I had no idea what I was doing. I liked the rounded look of the tabs in this painting. But since I had little to no game-plan I ended up making something like the thing on the middle right (images from someone else and from the Tudor Tailor book - I just should have taken pictures and am trying to find a reference):

Well, I took that idea and scalloped the outside edges. Then things happened with buckram, and in desperation I buttonhole stitched the edges and closed up the tabs and the end. I stuffed white fabric in the middle, attached them and called it a day.
The Sleeves I'd always planned on cutting slits in, but I didn't have time and the fabric wasn't nice enough for that much work. I drafted up this sleeve pattern (the wrists became smaller and this is only half):

And I found images of plain-fabric sleeves here and here, though the gold decoration down the inside seam appears to be standard, so I did put that decoration in.
The Veste


Ruff
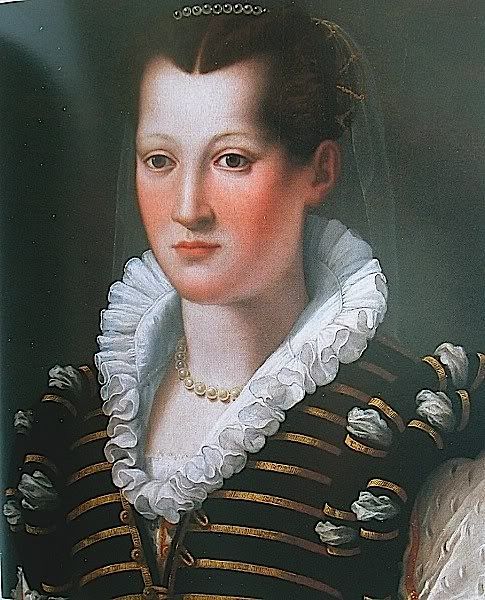
I needed a ruff, and took inspiration from here and here and here and here. I used Noel Gieleghem's instructions that can be found here. The ruff was made by machine except for the cartridge pleating. I used a lot of starch in the process and a conical curling iron for setting the ruff. The basic partlet pattern under the ruff is from what I used to start the pattern for the veste. Then I used four lengths of fabric that I thought was 60 inches wide, but I think it's 45 or so. Go figure. I used buckram to stiffen the collar, but considering the portraits, next time I will use handkerchief weight linen and nothing near that stiff in the middle. Also, I used the recommended 3" for the ruffle, and for this that was too much. That thing is just too big kind of all around. Oh, and I'll do it by hand.


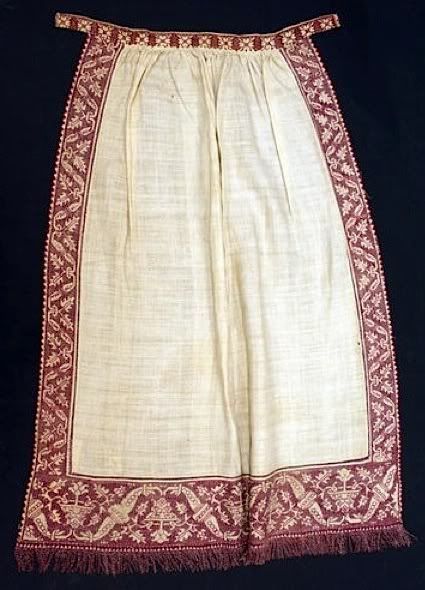
Apron
I winged this one a bit. Basically I wanted to do some pulled thread work and figured out how to include it. While I didn't exactly copy them, apron images are here and here and here and here and several here. All hand-stitching on this one, though I didn't have time to figure out how to finger-loop the tie.


Slippers
Ok seriously not everyone could have been wearing chopines all the time. I mean, I have a lot of heels, but on an every-day basis I wear ballet flats. So thus the adventure begun. I called in for reference help from my friend Paco (I know him as Pax) Smith. He sent these cute slippers which I tried to replicate:

But to me they looked a bit like isotoner slippers. I don't know - I just didn't love them. So I started working on another option.


And they turned out not too shabbily. I need to get a proper tie on the top of them, but there ay go. Here's the pattern and the shoes:

Yes, I wrapped my foot in duct tape to make the pattern.


Handkerchief
I started thinking that I would do drawn thread work, but that was taking forever, so i took a cue from some paintings and hemmed a handkerchief and made rather adorable tassels for the corners.

This can also be seen in the original inspirational photo for the veste. It was just too cute.


What I learned:
-The stiffness of the sottana is ok on its own, though a bit more than needed. Pairing it with the veste and the buckram within was too much, though. I think that I might try taking the hide glued fabric and a layer of felt out of the sottana.
-Stiffer fabric for making shoes helps.
-Natural fabrics for realz (tho on this project I don't mind too much since I was saving money and learning so much)
The whole project was quite fun. But I will admit that the first thing that I did after finishing the sewing was to clean my kitchen. It was a bit consuming. But it was worth it. Thanks!

No comments:
Post a Comment